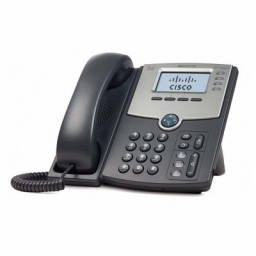
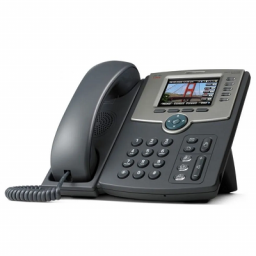
Cisco SPA501G, 502G, 504G, 508G, 509G, 525G – Manual Configuration
Cisco SPA501G, 502G, 504G, 508G, 509G, 525G - Manual Configuration
Factory Reset
If your phone has already been used then we recommend that you factory reset its configuration before starting.
- On the phone press the setup button.
- Use the directional pad and go down to Factory Reset
- Click OK to perform the factory reset, the phone should now reboot and default back to the factory default configuration.
Login to Phone
- Using the menu key on the phone, go to the “Network” option and press the “Select” button and note the IP Address
- Using your web browser enter http://IP_ADDRESS, so if the IP Address in step 1 was 192.168.0.34 enter http://192.168.0.34 and press enter on the keyboard
- Click the link “Admin Login” You should next be prompted for a username and password, the default is username: admin, password: admin
- Click “Advanced” to switch to advanced mode
Find IP Address of Phone
To find the IP Address of a Cisco Phone:
- Push Menu on the phone
- Status
- Network Status
- Look in the List for IP Address
Configure SIP
Next we need to configure the SIP Settings on the extensions. This guide will configure Extension 1 on the phone, the first line. Click the “Ext 1″ tab to begin. Now fill in each of the sections below.
Proxy and Registration
- Set Line Enable – YES
- Set Proxy to – SIP_SERVER (where SIP_SERVER is your SIP Server address, this can be found in your account notification)
- Register Expires – 180
SIP Settings
- SIP Port – Make this a unique number between 6000 and 6999 for all your phones (e.g. make extension 1 – 6001, extension 2 – 6002 etc)
Subscriber Information
- Display Name – You Name e.g. John Smith or Sales
- User ID – Extension Number e.g. 1001 (this can be found in your account notification or in the portal)
- Password – Your Extension Password (this can be found in your account notification or in the portal)
- Use Auth ID – Yes
- Auth ID – Extension Number e.g. 1001 (this can be found in your account notification or in the portal)
- Preferred Codec – G729a
- Second Preferred Code – G711a
- Use Pref Codec Only – No
NAT Settings
- NAT Mapping Enable – Yes
- NAT Keep Alive Enable – Yes
Dial Plan
- Set Dial Plan to [x*].
*Please make sure to add the full stop to the above, outbound calls will not work without this.
Voicemail Number
Click the “Phone” tab and set the field “Voice Mail Number” to *101 or *98 if you want it to prompt you to enter the User ID.
SIP Settings
Click on the “SIP” tab.
RTP Parameters
- Set RTP Packet Size – 0.020
SDP Payload Types
- G729a Codec Name – G729
NAT Support Parameters
- Set Handle VIA rport – Yes
- Set Insert VIA rport – Yes
Save Config
Now that you have made the change click the button at the bottom “Submit All Changes” and your phone will restart and should register the extensions. Once the phone has restarted you should be able to dial *90 which will provide you an echo test where everything you say will repeated to you.