Grandstream HT503 – PSTN Gateway
Grandstream HT503 – PSTN Gateway
The instructions on this page will guide you though how to configure your HT503 device to forward calls from your PSTN line to your HostedPBX service.
To follow this guide you will need:
- HostedPBX Extension for the PSTN gateway to register to.
- The Number you wish to divert the calls to.
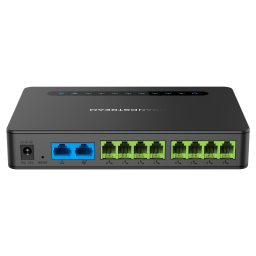
Hardware Connections
The HT503 device is also a router and if you have not already connected it to your network you will need to complete this step.
- Connect your computer via Direct cable connection from the ethernet port on your computer to the LAN port on the HT503
- Connect a cable from your broadband router to the HT503 WAN port
Accessing the Administration
- If you are connected to the ethernet port of the device you should be able to browse to http://192.168.2.1
- Enter the password admin and click login
Basic Settings
Click the link at the top labelled “Basic Settings”, and set the following options on the page:
- Time Zone – Set to your local timezone e.g. GMT +10 (Brisbane, Sydney, Melbourne, Canberra, Guam, Hobart)
- WAN side HTTP/Telnet access – (Please note, it is extremely important that your device is not accesible on the internet with this option enabled. If your device is externally accessible it could leave your device open to be exploited by a remote attacker. If you are unsure, please leave this disabled and contact your IT support personnel.)
- Unconditional Call Forward to VoIP – This sets the destination where your calls will be forwarded to
- User ID: Your main HostedPBX VoIP number e.g. 613912341234
- Sip Server – Your SIP Domain, this can be found on your account notification or via the voice portal.
- Sip Destination Port – 5060
- Click “Apply” to save the changes, and then click “Reboot” to reboot your device
Advanced Settings
Click the link at the top labelled “Advanced Settings”, and set the following options on the page:
- Admin Password – Set this to a secure password, this will be used to access your device in future
- Click “Apply” to save the changes, and then click “Reboot” to reboot your device
FXO Port
Click the link at the top labelled “FXO Port”, and set the following options on the page:
- Primary SIP Server – Your SIP domain, this can be found in the portal or on your account notification
- SIP User ID – The extension number you will use for the PSTN account e.g. 1001
- Authenticate ID – The extension number you will use for the PSTN account e.g. 1001
- Authenticate Password – The extension password
- Name – PSTN

- Outgoing Call without Registration – No
- Register Expiration – 3
- Check SIP User ID for incoming INVITE – Yes
- Allow Incoming SIP Messages
from SIP Proxy Only – Yes - Preferred Vocoder
- Choice 1 – G729
- Choice 2 – PCMA
- Choice 3 – PCMU

- Caller ID Scheme – ETSI-FSK during ringing
- FSK Caller ID Minimum RX Level (dB) – 40
- Caller ID Transport Type – Relay via SIP From
- AC Termination Model – Country-based
- Country-based – Australia/New Zealand
- Number of Rings – 2
- PSTN Ring Thru FXS – No
- PSTN Ring Thru Delay (sec) – 1
- Click “Apply”
- When you now dial your PSTN number it should be answered by the HT503 and forwarded via VoIP to your HostedPBX.
FXS Failover
In order to ensure you always receive calls it is best to connect a phone to the phone/FXS port. This way if the power drops or the devices becomes unregistered incoming PSTN calls will be diverted to the phone port and you will still be able to make and receive calls.
Troubleshooting - Random Call Drop Outs
If you find the calls randomly drop out you can try changing the SIP port of the HT503, follow these steps to change the port
- Login to the HT503
- Click FXO Port
- Set Local SIP port – Set to something unique on your network e.g. 4999
- Click “Apply” to save the changes
Factory Reset
If for any reason you need to factory reset your HT503 device you can follow these steps.
- Using a pin or a paper clip press and hold the reset button on the device for 10-15 seconds. The device will reset and be back to a factory configuration.